Day 9: Peppermint Ganache Cups

What? Ganache?! Are you crazy? That sounds hard!

Don’t worry. Take a breath. I was scared too, but it turns out this is so simple!

These delightful little chocolate cups were my very first candy making experience. No oven required, I’ve always heard horror stories about burning chocolate but I faced my fears and ended with marvelous results.

The bottom layer is an intense dark chocolate, peppermint ganache quickly topped with a creamy white chocolate layer finally sprinkled with crumbled candy canes. I took them to a Christmas party and they were quickly gone. They look cute and make for the perfect bite-sized refresher.
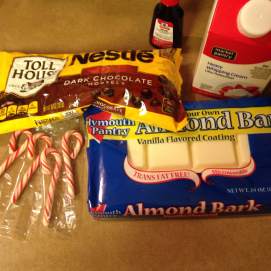
Ingredients
8 oz. dark chocolate (semi- sweet would be good too)
8 oz. white chocolate
1/2 c. whipping cream
1/2 tsp. peppermint
5 crushed candy canes (I used mini)

IMG_4610

To begin we start with a double boiler. I know, I’ve never used one before either but you will quickly realize this contraption is a masterpiece!

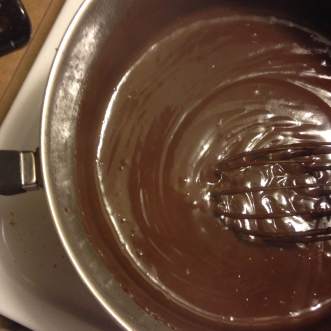
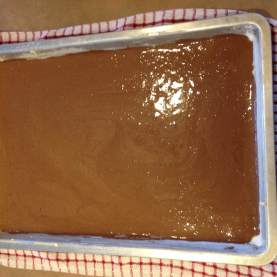
Dark chocolate, peppermint, and whipping cream go in the pot.
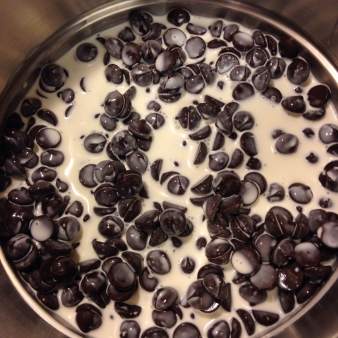
IMG_4611

This looks nice.

IMG_4612

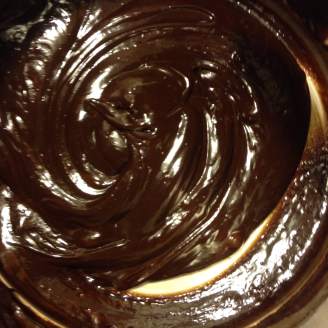
But this looks so much nicer. Out of sheer fear, I stirred mine constantly to assure no burnt chocolate. You can live your life on the edge if you want to and stir occasionally.

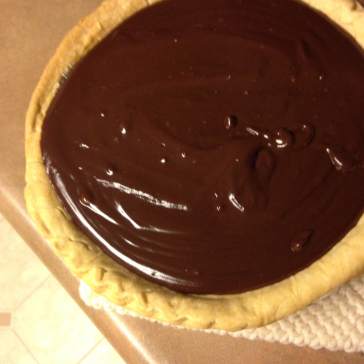
Once melted, it’s time to fill out mini cups.

IMG_4614

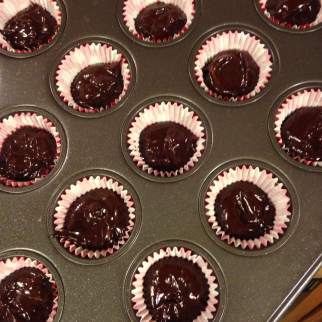
Fill them half way, a spoon and mini spatula do the job nicely. Fingers could work too. Admire your work and let them sit in the refrigerator for 30 minutes to allow the chocolate to harden. To pass the time, lick out the bowl.. and then wash it because we’ll need it again to melt the white chocolate.

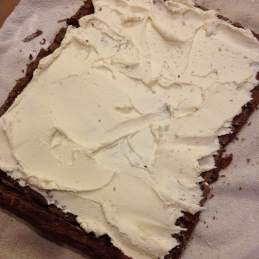
White chocolate goes in the double boiler and once melted sits beautifully atop the dark chocolate ganache. (Apparently I was so mesmerized by the melting white chocolate that I forgot to take a picture of it.

IMG_4615

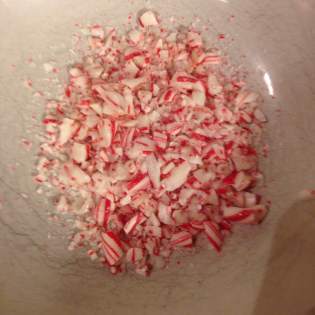
Candy canes get pulverized. I used the butt of a knife. You use what works best.

IMG_2275

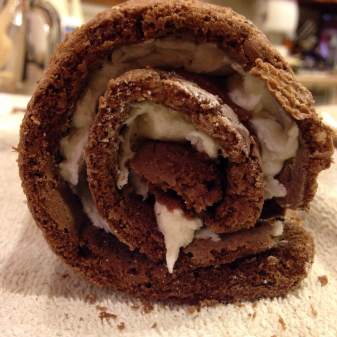
Back in the fridge for another 30 minutes and they are ready. Quick, simple. They made me happy and I hope they make you happy too.


Day 8: Chocolate Pie

I am now one week into my Christmas break and after having time to reflect and meditate on my semester of ups and downs I have come to one zen attitude towards love and life.

minnie

If you haven’t seen The Help you need to in order to properly make this chocolate “eat my shit” pie. The recipe is simple, wonderful, and I may or may not have already eaten half of it. I have no shame. Let’s get started.

My favorite part of this recipe is that you throw all of the ingredients into one saucepan and mix it all up. No “slowly incorporate” or “mix each individual egg”. This recipe is a one-pan wonder.

Ingredients:
1/2 c. cocoa
1/4 c. cornstarch
3 egg yolks
1 1/2 c. sugar
1/4 tsp. salt
2 c. milk
1 tsp. vanilla

All goes in a large saucepan constantly stirred on medium/high heat. I use a whisk for mine and beat mine well in order to get the clumps out from the cornstarch. Bring this to a boil and then reduce the heat to medium/low. Keep whisking for roughly 5 minutes or until it thickens.

IMG_4603

AKA whisk it until it looks so luxurious you would want to bathe in it. Whisk until you start having dirty thoughts about it. This is a beautiful pie. I really love this pie.

I’m sorry. Once thickened pour into a baked pie shell (I used store bought and I DON’T CARE). Now comes the hardest part… Let this pie cool for 30 minutes AND THEN it goes to the fridge for at least 4 hours…. 4… hours. It’s excruciating. Boarder line torturous.

IMG_4605

Since I usually bake at night, this meant me waiting until 2 in the morning to eat chocolate pie in my pajamas. What a wonderful life we live.

Day 3: Sugar Coated Pecans

As I begin my first few days of sweet sweet Christmas break, I find myself focusing on the little things. Like spending my evenings doing yoga, re-watching Gilmore Girls, and stuffing my face with handfuls of sugary pecans.

The recipe is simple and found thanks to allrecipes. I’ll walk you through the basics but I know you can do this without pictures. It’s easy I promise.

Ingredients:
1 egg white
1 tbsp water
1 lb pecan halves
3/4 tsp salt
1 cup sugar
1 tsp cinnamon

Yes, if you’re comparing recipes, I did up the cinnamon amount. I live by my own rules. I do what I want. I live life on the edge. You should do.

Here’s what you gotta do:

  1. Beat that egg white until it’s frothy.
  2. Add pecans to egg white, mix until covered.
  3. Combine dry ingredients.
  4. Add coated pecans to dry ingredients and mix real good.
  5. Bake in a 250 degree oven for 1 hour, stirring every 15 minutes (or so, I cheated a little. They were fine.)

Your kitchen will smell like heaven, people will taste one, and then take a handful, and declare you as a god. It’s a nice feeling. You’ll make another batch before the end of the week.

IMG_4581

The next day (day 4 of the challenge) I made blueberry muffins. They photographed much better than the pecans and fill me with joy.

Day 2: Chocolate Swiss Roll

Remember in the days of your youth when you would pig out on those Little Debbie Swiss Rolls? And then you grew up and realized they’re a zillion calories and swore them off for good? Me too.

My grandma is famous for making her pumpkin roll, which my mother never likes due to her distaste for all things pumpkin flavored. So, I decided to pay homage to both her and my childhood days and make a chocolate swiss roll. I figured it seemed easy enough… boy was I wrong

IMG_4566

Do you see that? That is the eye of evil. Just kidding. But to be honest, this was not one of my favorite baking adventures. The swiss roll takes a lot of time, love and patience. Three things I sometimes lack. However, if you do feel truly worthy of such a task, then let’s begin.

First we select a half-baking sheet which follows with Jamie’s Mistake #1. USE PARCHMENT PAPER. This cake sticks to the pan like none I have every seen before and a cooking spray/flour combo will simply not do. Our oven is preheated to 425 degrees and 3 bowls of different sizes are plucked from the shelf because these ingredients hate each other.

Bowl #1: a small bowl for dry ingredients;  cocoa, flour, salt, and baking powder) sift them together.

Bowl #2: In a medium bowl, 4 egg whites whisked until they just can’t take it no more (aka soft peaks). This is my favorite part. I love watching the ooey-gooey egg white transform into soft puffy love (i’m poetic like that).

Bowl #3: In a large bowl, the 4 egg yolks and sugar are beaten until they lose their dark color and turn a beautiful light yellow.

IMG_4557

So, now you have something like this. Great, you are totally nailing this swiss roll. Don’t get cocky.

First add the dry ingredients into the egg YOLK bowl. It’s going to be rough but stay strong. Next slowly incorporate the egg WHITE into the mixture which will thin the batter out a little bit. Marvelous, now you’re left with one bowl which get’s poured into your PARCHMENT LINED sheet. (Capitalization is used for your own good. I’m not trying to yell.)

IMG_4561

How nice is that? Too bad that after it’s baked for 6 minutes it will come out looking like this…IMG_4563

Horror. Absolute horror. It took a lot of sweet talk to get this poor cake out of my floured pan. A lot of “it’s okay. It’s all going to be okay, you can do this. Don’t break apart we can do this together.” I’m not sure if I was talking to the cake or myself. I’m also not sure which would be more weird.

Roll it up tightly in a towel while it cools so that it can take some time to form it’s spiral. Once it’s cooled fill it with whatever your heart desires. IMG_4564

My heart desired a mountain of vanilla buttercream. Jamie’s mistake #2, pay special attention to putting icing on all sides and corners so that every slice of cake is perfect and your pictures don’t suck.

IMG_4566 (1)

See? Not what I was going for.

IMG_4565

When you do roll your cake it will probably crack. It’s not that I don’t trust you, it’s just how life works. Don’t worry, we’re going to cover it with gaze and nobody will know.

IMG_4570

No problem. And the good news? Pretty much no matter how bad it looks, this chocolate swiss roll tastes amazing. Chocolate spungy cake and twice as much sweet buttercream; don’t count the calories in a “Little Debbie” fashion and try to forget how hard this actually was.

Ingredients
1/4 cup cocoa powder
1/3 cup cake flour
1/4 tsp salt
1 tsp baking powder
4 eggs (yolks and whites separated)
1/2 cup sugar

Jamie’s Christmas Baking Challenge 2015

Hi. How are you? How’s life? Yes, I’ve missed you too, so dearly. Now that my fall semester is over, I have a new surprise to make up for my prolonged absence… are you ready? Can I get a drumroll?

Introducing…

Screen Shot 2015-12-11 at 11.11.23 PM

The challenge: Starting this evening, December 11, 2015 until Christmas evening our contender, Jamie Schueler, will bake every single day. While the road may be difficult complete with fallen cakes and clumpy icing; she is willing to bet her mothers kitchen, 2 boxes of butter, and her own sanity for the sake of Christmas spirit. 

I hope you will follow me on this journey; because that’s what friends do right? And because i’m sure it will be a learning experience for us both. I promise to blog as often as possible and tell you all my baking secrets (there aren’t a lot). But most of all, I promise to have fun and to share my treats with the wonderful people who have made my life so exceptional this past semester.

I’m excited. Are you excited? Great. Let’s do this.

Continue reading “Jamie’s Christmas Baking Challenge 2015”